Sunday, March 25, 2012

Creme Egg Surprise Easter Cupcake

Creme Egg Surprise Easter Cupcake..YUM!

After a post on my facebook page asking for some challenging ideas for Easter cupcakes, a follower came back to me to do a "Creme egg styled cupcake". I thought about it for a few weeks and after finding mini Creme eggs at the grocery store, I had the base for the idea. I wanted to work out a way to submerge a creme egg into the centre of a rich, moist chocolate cupcake, but have the 'Creme' still visible. The trouble with that is, when baking a soft centred chocolate into the middle of a cupcake, it generally melts into the cake batter in no time, and disappears. So the next question was, how do I prevent the egg from disappearing?

I searched the web for ideas and came by a recipe for a rolo cupcake (which I had tried to do myself before and failed to get the desired outcome.) In this recipe they added frozen rolo's into the centre of the cupcake to bake. Thus slowing down the cooking time of the chocolate, and resulting in the rolo still being in one piece after the baking process. This was the answer I had been searching for, and knew that the 'Creme egg cupcake' I had been dreaming about, was one step closer to being a reality.

For the rich and moist chocolate cake, I decided on a Devil's food cupcake recipe - but didnt know how to incorporate this into the name. Being an Easter themed cupcake, I thought the word devil would be in poor taste. Due to a lack of imagination, I had no real choice but to name this cake as if it were a Kinder suprise. This was the one thing that kept coming back to me, that there was this gooey little mess of surprise waiting to be bitten into. In this case, I went with..... Creme Egg Surprise.

Hope you enjoy the recipe!

Eggs being submerged in the centre..

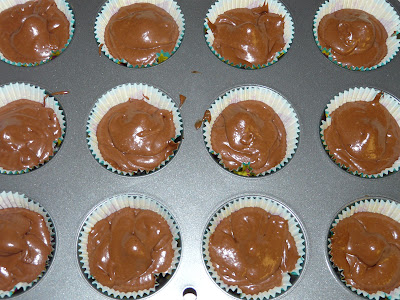
Ready to bake..

Fresh from the oven..

I just love the look of this piping technique..


Ready to sprinkle and decorate...
Easter sprinkles are added..

The gooey centre!!
Creme Egg Surprise Cupcakes
Makes 12 cupcakes
Prep time: 30 mins         Cook time: 20 mins

Devils food cupcake (adapted from Martha Stewarts recipe)

1/4 cup  dutch-process cocoa powder
1/4 cup hot water
1 cup all-purpose flour
1/3 teaspoon baking soda
1/3 teaspoon baking powder
1/2 teaspoon coarse salt
1/2 cup butter (1 stick)
3/4 cup sugar
1 whole egg + 1 egg yolk
1 teaspoon vanilla extract
1/3 cup sour cream
12 mini Cadbury Creme eggs frozen & de-foiled ( I found it easier to de-foil before freezing as the foil can become stuck to the egg and once frozen can be a mission to remove it all)


Preheat oven to 350 degrees F (180 degrees C) and line cupcake pan with 12 baking papers. 
Whisk together the cocoa powder and hot water until mixed well and consitency appears smooth. In a seperate bowl combine flour, baking soda, baking powder and salt. 
Melt butter and sugar in a saucepan over medium-low heat until combined, stirring at all times. Pour into mixing bowl and beat on a medium speed for 4-5 minutes. Add eggs and beat until incorporated into mixture, scraping sides down regularly. Add vanilla, then cocoa mixture and beat until combined. Now add half of the dry ingredients and half of the sour cream, and mix on low until combined and repeat for second half of remaining ingredients. 


Divide batter evenly amongst baking papers, submerging the creme egg in the centre of each cake. Be careful to cover the top of the eggs in each cupcake to protect them from the heat of the oven. Bake until cupcake is firm to the touch or cake tester inserted into the side of the cake comes out clean (remembering theres a melted chocolate egg inside so may give you a false negative of not being baked.) Allow cakes to cool for 5 minutes in the baking tray before moving to wire rack to cool completely. 

While waiting to cool make your frosting as follows:-

Chocolate buttercream frosting
 
 225gm (2 sticks) Unsalted butter at room temperature
1 tablespoon vanilla
2 cups Icing sugar (or use amount according to desired thickness for piping)
1/4 cup Cocoa powder

Whip butter on medium speed for 4-5 minutes. Add vanilla and cocoa powder and mix on low speed until combined. Gradually add icing sugar until desired thickness is reached for piping or spooning onto cupcakes. Decorate cupcakes and Enjoy!

Thursday, March 22, 2012

White Chocolate cupcakes & Baileys Frosting


 After such a rich post last week I thought it best to tone it down a bit, and give you a little recipe I enjoy making on a rainy day.... or in this case, on a day I had left over Bailey's forsting and wanted to adapt it to something that would enhance the flavour of the Bailey's, not take away from it. Needless to say, but the white chocolate mud cupcakes really do work well with Bailey's frosting.

I personally do not like white chocolate, and try to avoid it as much as possible. I have a rule that the only time I choose to have white chocolate is in the Lindt truffle balls. There is an exception to my rule though, and that is this wonderful recipe. The white chocolate does not stand out, it seems to enhance the cakes flavour, and almost caramelises. So if you too, are not a white chocolate fan at the best of times as I am, do yourself a favour, try this recipe! It really is worth the trouble, time, effort and clean up. However, be warned... its hard to stop at one! I made mine mini so they were a little less guilty. 

Hope you have as much fun making these as I did! 


White Chocolate Mud Cupcakes & Bailey’s Frosting

Makes 12-18 cupcakes

Prep time:- 20 mins Cooking time:- 20-30 mins

For the cupcakes:
  • 125g butter, chopped coarsely
  • 80g White Chocolate, chopped coarsely
  • 1 cup granulated/caster sugar
  • ½ cup milk
  • ½ cup plain flour
  • ½ cup self-raising flour
  • 1 egg

Preheat oven to 170 degrees C (340 degrees F) and place 12-18 cupcake papers in the cupcake pan.
Stir butter, chocolate, sugar and milk in a medium saucepan over low heat until smooth. Transfer to a medium bowl and let cool for 15 minutes. Whisk sifted flours into the chocolate mixture and then add the egg.
Use a piping bag or batter dispenser to distribute the batter into cupcake papers evenly – approx ¼ to ½ way filled.
Bake for 20 – 30 mins until lightly coloured on top. Skewer or cake tester will come out of cake clean when complete. Stand cakes in pans for 5 mins before transferring to wire rack to cool completely before icing.

For the Baileys Frosting:
1 cup unsalted butter, at room temperature
3 cups powdered sugar
1 teaspoon vanilla extract
4 tablespoons Bailey’s Irish Cream

Using the whisk attachment of a stand mixer, whip the butter on medium-high speed for 5 minutes, scraping the sides of the bowl occasionally. Reduce the speed to medium-low and gradually add the powdered sugar until all of it is incorporated. Add the vanilla and Baileys, increase the speed to medium-high and whip for another 2 to 3 minutes, until it is light and fluffy.

Enjoy!! 


Friday, March 16, 2012

St Patricks cupcakes - The Irish Trifecta

Irish Trifecta Cupcake - theres so much alcohol in them, even the cupcake looks drunk!
With St Patricks day only a day away, I thought it was appropriate to find a cupcake recipe that would represent everything Irish that I love.. well.. not everything, but everything sweet yet alcoholic! I had been hearing whispers of a very bizzare mix of flavours, Guinness & Chocolate cupcakes, and I couldnt believe it was true. Eventually though, while scouting the ends of the Pinterest, I found the recipe! I think the name of it alone captured me, The Irish Car Bomb. Indeed, once you start reading the list of ingredients it becomes clear that this is definitley going to be an adults only type recipe. We begin with a Guinness & Chocolate cupcake, with an Irish Whiskey Ganache filling and a Baileys buttercream frosting. A trifecta of flavors that just work so intensely well together.

A little background on the name of the cupcake, the Irish Car Bomb is actually a drink that comes as a shot of Irish Whiskey and Baileys dropped into a 3/4 full pint of Guinness, which is then chugged down as fast as possible as not to let the Baileys curdle the beer. I havent tried one myself, however am very intrigued by it! 

Due to a lot of controversy over the name of these cupcakes on the original blogger who I adapted this recipe from, I have chosen to give the original names history and considerately create my own name for these cupcakes. My wish here is simply to provide a range of different recipes that I try out and not to offend anyone when doing this. So hence how I came up with naming them, the Irish Trifecta.

Now being the better part of Irish descent, I of course always have a good Irish Whiskey in the house, Bushmills (You can use however, Jameson's Irish Whiskey) - and who doesnt keep a giant bottle of Baileys Irish Cream in their fridge? The only item I didnt have was the Guinness. Sometimes I drink it, but generally only out at a bar - so I had to call in some assitance from my husband to pick a bottle up on his way home from work, especially to try this recipe out.

In the original recipe, it says the prep time in total was 40 mins, and cook time 18 mins. So I thought an hour would be plenty of time to get these baked, filled & frosted. However I can tell you right now, it took me closer to 2 hours in total, to allow for cooling time, setting time and piping time. It may have also had something to do with the fact that I had to have a glass or two of Baileys on the rocks while baking these cupcakes - who can resist after all?

The cupcake recipe I halved and followed almost to the very last detail. However, Im a very firm believer in vanilla, so always add a teaspoon to all of my cupcake recipes and to my frosting recipes. Like I tell people who ask me for my number one tip, vanilla is the salt of sweet foods. I also added more Whiskey to my ganache and think next time I do a Baileys frosting, I'll get an essence rather then actual Baileys. I didnt find the flavour strong enough without losing the consistency of the frosting.

Anyway, make of it what you will from the following photos and recipe. The recipe was adapted from Brown Eyed Baker.


Chocolate & Guinness cupcake mix ready to be baked

Cupcakes baked and ready to core for filling
Cored cupcakes ready for filling to be injected
I used Bushmills Irish Whiskey for the ganache. Note the smooth conistency

The filled cupcakes ready for icing
I used a disposable piping bag to inject the cupcakes
Baileys Buttercream frosting
Irish Trifecta cupcakes..


The inside of the delightful Irish Trifecta Cupcake


Irish Trifecta Cupcakes


Prep Time: 40 minutes | Bake Time: 18 minutes


Makes approx 12 cupcakes
For the Cupcakes:

1/2 cup Guinness stout
1/2 cup unsalted butter, at room temperature
2 ounces Dutch-process cocoa powder
1 cup all-purpose flour
1 cup granulated sugar
¾ teaspoons baking soda
1/2 teaspoon salt
1 egg
1/3 cup sour cream
1 teaspoon vanilla extract

For the Whiskey Ganache Filling:
4 ounces bittersweet chocolate
1/3 cup heavy cream
1 tablespoon butter, at room temperature
2 tablespoons Irish whiskey (Bushmills or Jameson's)

For the Baileys Frosting:
1 cup unsalted butter, at room temperature
3 cups powdered sugar
1 teaspoon vanilla extract
4 tablespoons Baileys Irish Cream

To Make the Cupcakes:

Preheat oven to 350 degrees F. Place 12 cupcake papers in cupcake pan. Bring the Guinness and butter to a simmer in a medium saucepan over medium heat. Add the cocoa powder and whisk until the mixture is smooth. Cool slightly.
Whisk the flour, sugar, baking soda and salt in a large bowl to combine. Using an electric mixer, beat the egg and sour cream on medium speed until combined. Add a teaspoon of vanilla, mix and add the Guinness-chocolate mixture to the egg mixture and beat just to combine. Reduce the speed to low, add the flour mixture and beat briefly. Using a rubber spatula, fold the batter until completely combined. Divide the batter among the cupcake liners. Bake until a skewer or cake tester inserted into the center comes out clean, about 18 minutes. Cool the cupcakes on a rack.

To Make the Whiskey Ganache Filling:

Finely chop the chocolate and transfer it to a heatproof bowl. Heat the cream and chocolate in the micrwave on 50% heat for 30 seconds.Stir mixture until chocolate is completly melted and smooth. Add butter and whiskey and stir until combined. Let the ganache cool until thick but still soft enough to be piped.

To Fill the Cupcakes:

Using a 1-inch round cookie cutter (or the bottom of a large decorating tip), cut the centers out of the cooled cupcakes, going about two-thirds of the way down. Transfer the ganache to a piping back, cut off the tip and fill the holes in each cupcake to the top.

To Make the Baileys Frosting: Using the whisk attachment of a stand mixer, whip the butter on medium-high speed for 5 minutes, scraping the sides of the bowl occasionally. Reduce the speed to medium-low and gradually add the powdered sugar until all of it is incorporated. Add the vanilla and Baileys, increase the speed to medium-high and whip for another 2 to 3 minutes, until it is light and fluffy.

Using your favorite decorating tip, or an offset spatula, frost the cupcakes and decorate with sprinkles, if desired.

Store the cupcakes in an airtight container for up to 4 days.

Enjoy! :)

Wednesday, March 14, 2012

Chewy Sticky Date Cookies


A friend of mine asked for my help the other day, to either find, create or tweak a recipe for a chewy Sticky date cookie. After a little bit of research I found exactly what I was looking for. I made a few tweaks and the results were just unreal.

It was funny to recieve this request only a day or two after my visit to "Down to Earth" where I found whole dates and couldn't walk past them without buying a few. I dont normally keep dates in the house like this, so it was a really lucky coinsidence. And I was thinking of doing a sticky toffee cupcake, but I tell you what, the cookies worked just a treat! The recipe follows.

Chewy Sticky Date Cookies

Prep time:- 10 mins; Cook time:- 16 mins

Makes approx 24 cookies

1/3 cup butter, softened
2/3 cup packed brown sugar
1 teaspoon vanilla extract
1 egg
3/4 cup all-purpose flour
2/3 cup whole wheat flour
2 teaspoons grated lemon peel
1 1/2 teaspoons baking powder
1/2 teaspoon ground cinnamon
1/2 teaspoon ground nutmeg
1/4 teaspoon salt
1/4 cup fat-free milk
1 cup chopped dates, lightly dusted in flour
  
Pre-heat oven to 325 degrees F (160 degrees C.)
In a mixing bowl, cream butter and brown sugar. Add egg; mix well. 
In a seperate bowl, sift the flours & baking powder together. Then add the lemon peel, cinnamon, nutmeg and salt. Add to creamed mixture alternately with milk, beating well after each addition. Lightly coat dates in flour before stiring into mixture. This enables the dates to mix evenly through the mixture, without large clumps sticking together.
Line trays with parchment paper as shown in pictures. 
Drop by rounded teaspoonsfull 2 in. apart onto lined trays. Bake for 13-16 minutes or until lightly golden on top, and toasty brown on the bottom. Leave on trays for 5 mins to cool, before moving to wire racks to cool completely. Dust lightly with icing sugar and serve. Store in an airtight container for up to 5 days. 
 Enjoy!
The batter should appear smooth and sticky as pictured
  
Place small amounts of cookie batter in corners of tray..

...batter will act as a glue and hold the parchment paper down and stop it from rolling up.
Place batter approx 1.5 - 2 inches apart.
I used two teaspoons, one to scoop, the other to scrape.
Tray of cookies ready for the oven.
The finished product.
golden on top, toasty brown on the bottom.
After 5 minutes of cooling in the tray, place on wire racks to completely cool.

Inside the cookie, lovely, chewy & fluffy texture.


Monday, March 12, 2012

Coconut Ice Cupcakes


After moving to Hawaii almost 3 months ago, I came to the realisation that ingredients are so different over here! Not just the names, but the products as well. My biggest concern to date was trying to find dessicated coconut. It seemed almost impossible and I was coming up with ways which I could turn shredded coconut into dessicated coconut. Yes thats how desperate I was beginning to get. I couldnt imagine 3 years without lamingtons, rum balls coated in coconut, and my favourite moist coconut cake. After having morning tea with a few ladies the other day at the Vegetarian shop, I thought I may as well do a quick shop and see what interesting things I could pick up. To my surprise, I picked up bags upon bags of "macaroon coconut", which is basically the same as the dessicated coconut I've come to love. Now, it is just a little finer then what I'm used to, but heck, it tastes just as good and works a treat!

So after buying bags upon bags, I then had the task of working out exactly what I would make with my coconut. Finally, I had this hankering for my mothers coconut ice cake. However, I didnt have her recipe, and I really wanted to make them cupcakes. So I had a little bit of fun and created my own recipe, which I am just so thrilled worked out to taste amazing. When it came to the frosting however, I knew it HAD to be the same as the one my mum used on her cake. So after begging her for the recipe, she finally gave it up and I got the most perfect coconut cupcake to boot. Check them out for yourself, they really look awesome, and taste like my childhood! Lets just say, after finishing them off and decorating them a little, I ate two.. in a row.

The batter ready to go into baking papers


Saturday, March 10, 2012

Easter Cupcakes


I had an interesting idea that Easter is a very chocolate filled holiday. So what better to represent our favourite bunny treats but to have the most chocolate-y filled cupcake I could manage! I requested a few ideas through facebook, which I did receive one or two, but I had stuck in my head, chocolate Marshmallow cupcake.

So after 3 hours of trial, error, taste testing and my husbands critique, we formed the perfect formula for the cupcake. We ended up stuffing about 3 Jiffy Royale marshmallows into the centre of a chocolate chip, chocolate cupcake. Then to finish, I did really want to use a chocolate icing as I had pictured in my head vibrant purples, pinks & aqua icing to match in with the speckled m&m eggs which garnished the top of the cupcake. So I did Cotton Candy icing, which really complemented the chocolate. So following, are the step by step images of what I created. Followed by my own personal recipe.


Chocolate Chip,Choc Marshmallow, Chocolate cupcake recipe


Prep time:- 15 mins; Baking time:- 18mins

Makes approx 18 cupcakes

225g (8 oz) softened butter
225g (8 oz) caster/granulated sugar
Vanilla extract - approx 1 tbsp
4 eggs
225g (8 oz) Self Raising flour
1 tsp baking powder
2-4 tbsp cocoa powder (depending how chocolaty you want them)
100g chocolate chips
54 chocolate marshmallows (I used the Kraft Jet-Puffed Chocolate Royale's)

Pre-heat oven to 350 degrees Fahrenheit (180 degrees celcius), and place 18 baking papers in cupcake pans.
Using a mixer, cream butter and sugar until light and fluffy and no sugar granules are visibly left.
Add vanilla and then one egg at a time until well mixed. You will notice the batter will appear to be "split". Don’t worry, it will work out, trust me. Remember to constantly stop the mixer and scrape the sides as often as required.
In a separate bowl sift flour, baking powder and cocoa powder together. You can do this a number of times. The more times you do it, the fluffier the cake will be. (This is my secret people!!!!)
Now add to the wet mix slowly on a low speed. Scrape edges and beat for around 2 mins until smooth and pale.
At this stage I sometimes add about 1/4 cup of sour cream and some melted chocolate to make it more chocolate-y and moister. But this is up to you, it’s not necessary.
Finally, add the chocolate chips (these are also optional.)

Spoon or pipe mixture into cupcake papers - I fill it about half way. Place in oven for 8 mins.
Pull out and then push one marshmallow into each cupcake. Be sure to make this step as quick as possible as you don’t want to ruin the raising agents that are active in the cupcake. Place back in oven for a further 8mins. Remove and once again, place another marshmallow in the centre where you had put the last marshmallow (It would of created a bit of a crater in the cupcake). Place in oven for a further 1-2 mins to melt the marshmallow.
Finally, pull cupcakes out of oven and let cool in cupcake pans for 5 mins. Transfer to wire rack to cool. After 10 mins of cooling, I added another marshmallow to the cupcake and microwave for 20sec. What you end up with is visibly evident. You get the original marshmallow cooked into the cake, the second melts right down and the final, just seals the cake. Please note, cooking times may vary based on your own oven, so make sure you keep an eye on the cakes, and dont let them burn. You can adjust the times as you see fit.
Once completely cool they are ready to be iced. You can do anything with these - a simple chocolate butter cream icing might be nice. Or even a marshmallow frosting. Let your imagination take control and lead the way!

Enjoy!

Please let me know how you go with this recipe, as its the first one I have shared. I'd like to know how you have gone with it and if I can tweak the recipe instructions any way.